Tuesday 23 January 2024

Ink Lift Floral - Water Lifting Technique

#waterliftingtechnique, #inklifting, #toawildrose, #stephaniefischer, #stampinupdemonstrator, #lusterspecialitypaper, #cardmaking, #coloringtechniques, #colouringtechniques
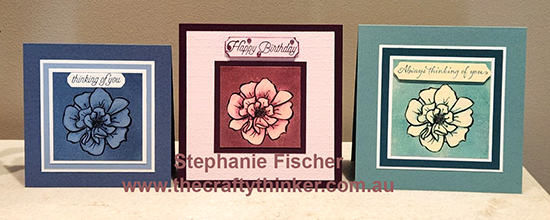
A trio of cards using the retired To A Wild Rose stamp set and water to lift colour.
The blue one is Misty Moonlight ink on Boho Blue Luster Speciality Paper
The other two cards have a base of gesso

I thought I'd go back to an old favourite of mine - colour lifting.  

If you've been around forever, like me, you'll remember heat embossing a design and then carefully applying bleach with an old paintbrush to lift the colour ... all while trying to ignore the horrible smell of the bleach and wearing old clothes in case of accidents!  But I did love the results of that technique!  I used to use bleach to paint little scenes for Christmas cards!

I have tried lifting the colour with water in the past, using coloured cardstock.  However, the coloured cardstock isn't designed to handle water and I haven't been keen on the results.  

But I've been experimenting again and am really happy with the results of two of my experiments: the first was using Luster Speciality Paper and the second was using a variety of cardstocks coated with gesso that I coloured with several drops of reinker.

#waterliftingtechnique, #inklifting, #toawildrose, #stephaniefischer, #stampinupdemonstrator, #lusterspecialitypaper, #cardmaking, #coloringtechniques, #colouringtechniques
The monochromatic approach gave a muted but elegant look to the project
Label is cut with die from the Delicate Forest die set (162679)

#waterliftingtechnique, #inklifting, #toawildrose, #stephaniefischer, #stampinupdemonstrator, #lusterspecialitypaper, #cardmaking, #coloringtechniques, #colouringtechniques
The tools and products I used for this project

A.  Water ink lift technique on Luster Speciality Paper 
For the blue card above, I used the Stampin' Up Luster Speciality Paper (151746).  The pack contains two 12" x 12" sheets each of the 2023-2025 In Colours and I chose to work with the Boho Blue.

The Luster paper has a coating which means that it can handle the water.  It does also mean, however, that ink tends to sit on top and needs patience or a heat tool to dry sufficiently.  I had so much fun I really thought it was worth it!  Depending upon how much water has been applied, the paper may warp a little - just pop it under something heavy for a while to help flatten it again.
  1. Apply a coat of ink all over the luster paper. 
    TIP: choose a shade that will provide sufficient contrast to the paper colour either in a similar colour for a monochromatic project or a different colour.

  2. Dry the ink thoroughly with a heat tool (or wait until it's dry)

  3. Use Stazon Jet Black ink (or alternative permanent, water-proof ink) to stamp the image. 
    TIP:  It's best to use a stamping platform because I have found that I always need to stamp the image at least 2 or 3 times to get an image that's dark enough. 
    TIP: The chosen image should have clear lines and be suitable for colouring. 
     
  4. Dry the ink thoroughly with a heat tool (or wait until it's dry)

  5. Use a brush to paint water onto the image, a section at time, and then blot with a clean piece of paper towel.  This will lift the ink from that area.  Repeat until you're satisfied with the amount of ink that's lifted.  You could use a Water Painter (151298) but I find this gives me less control than I like.
    TIP: Unless you want to transfer ink from one place to another, rinse the brush before each water application.
    TIP: To avoid accidents and finger prints, use a piece of paper towel to hold your project and under your working hand.  Moisture from your hands will also lift the ink.
    TIP:  for the more advanced or adventurous - try leaving some shadows (eg under petals) by varying the amount of ink that you lift and/or transferring some of the ink 
#waterliftingtechnique, #inklifting, #toawildrose, #stephaniefischer, #stampinupdemonstrator, #lusterspecialitypaper, #cardmaking, #coloringtechniques, #colouringtechniques
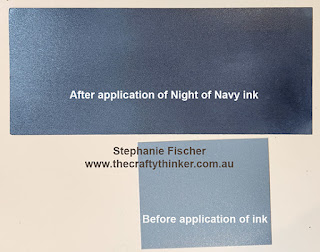
The Boho Blue Luster paper before and after adding the layer of  Misty Moonlight ink.

#waterliftingtechnique, #inklifting, #toawildrose, #stephaniefischer, #stampinupdemonstrator, #lusterspecialitypaper, #cardmaking, #coloringtechniques, #colouringtechniques
The work in progress, painting with water and then blotting to lift the ink


B.  Water ink lift technique on cardstock "altered" with coloured gesso (or uncoloured)

#waterliftingtechnique, #inklifting, #toawildrose, #stephaniefischer, #stampinupdemonstrator, #gessoandink, #cardmaking, #coloringtechniques, #colouringtechniques
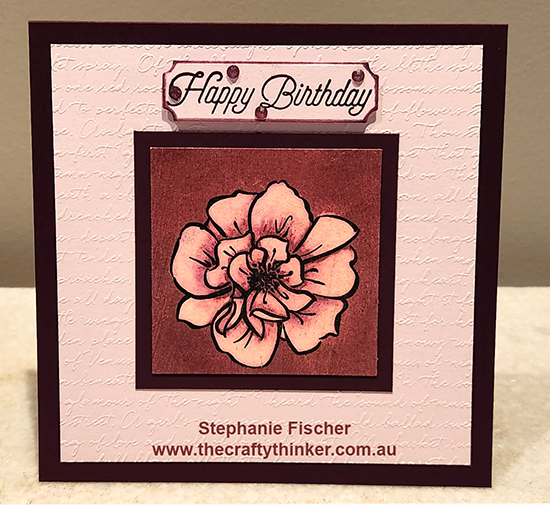
For this card I used some drops of Crushed Curry reinker in white gesso for the undercoat
The top coat is Blackberry Bliss ink
  1. Transfer some white gesso to a small container - I find a little goes a long way and probably used about a dessertspoonful. 

  2. Add some colour - I used ink from my reinker botte, adding a few drops at a time.  Alternatively, you could use a little acrylic paint.  Mix well.

  3. Evenly paint the surface of your choice with the coloured gesso.  I've used Basic White cardstock (159228), Basic White Thick cardstock (159230) and Watercolour paper (149612) but you could try other surfaces too: eg cardboard, wood ...

  4. Allow the gesso to thoroughly dry.  Since I'm impatient, I used a heat tool to help it along!

  5. Follow steps 1 - 5 from the Luster Paper instructions above.
#waterliftingtechnique, #inklifting, #toawildrose, #stephaniefischer, #stampinupdemonstrator, #gessoandink, #cardmaking, #coloringtechniques, #colouringtechniques
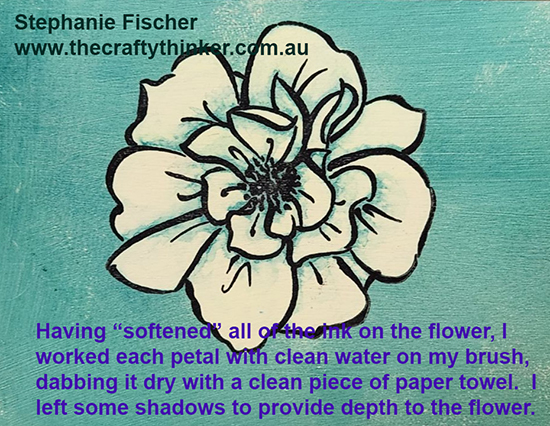
This is the work in progress, having done one application of lifting to each petal without rinsing my brush.  This gave me a softer ink layer which made it easier to leave a few soft shadows

#waterliftingtechnique, #inklifting, #toawildrose, #stephaniefischer, #stampinupdemonstrator, #gessoandink, #cardmaking, #coloringtechniques, #colouringtechniques
I used the same gesso mix on Basic White cardstock with a top coat of Pretty Peacock ink

#waterliftingtechnique, #inklifting, #toawildrose, #stephaniefischer, #stampinupdemonstrator, #gessoandink, #cardmaking, #coloringtechniques, #colouringtechniques
I softened the ink on the flower, as above, by starting with one application of lifting one petal at a time but without rinsing my brush.  Then I worked each petal until I was satisfied with the result.

#waterliftingtechnique, #inklifting, #toawildrose, #stephaniefischer, #stampinupdemonstrator, #gessoandink, #cardmaking, #coloringtechniques, #colouringtechniques
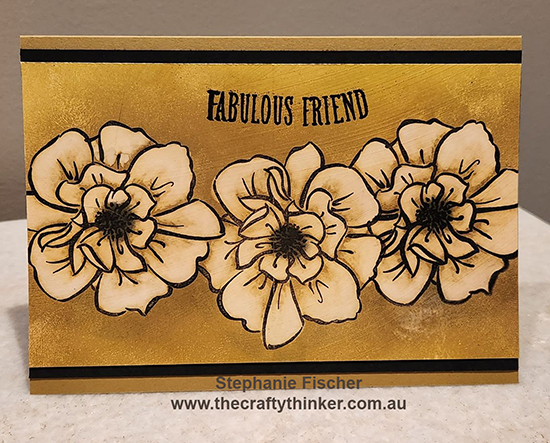
I used the same gesso mix on Basic White Thick cardstock.  When dry, I sponged with Wild Wheat ink adding Early Espresso ink towards the centre. I stamped the flowers using the masking technique.  I also added some Memento Tuxedo Black ink below the flowers.

Thank you for visiting.  If you have any queries or comments, I'd love to hear from you!

'Til next time ....

Stephanie Fischer
The Crafty Thinker

Tuesday 16 January 2024

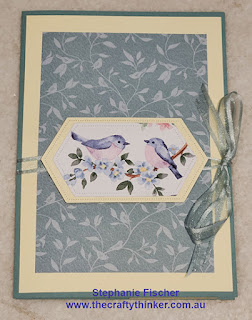
Concertina Pop Up Card using A4 cardstock with tutorial links


#concertinapopupcardfora4, #thecraftythinker, #stephaniefischer, #stampinupdemonstrator, #funfold, #masculinecard, #trustytoolbox, #concertinapopupcard
Fun fold: Concertina Pop Up Card suitable for A4 cardstock
Featuring Trusty Toolbox paper (162978)

Hello again!

I made a series of Concertina Pop Up cards which I thought I'd share with you.  

I first became aware of this impressive-looking fun fold while perusing Sam Calcott's tutorial videos.  I really admire her work and never fail to find inspiration from her.  So, following her clear instructions, I made the following card using one of the paper packs that I got FREE in Sale-A-Bration.  

The resulting card might just be one of my all-time favourite makes.

#concertinapopupcard, #thecraftythinker, #stephaniefischer, #stampinupdemonstrator, #funfold, #flightandairy, #concertinapopupcard
Concertina Pop Up Card featuring Flight & Airy paper available FREE during Sale-A-Bration

However, it didn't fit two of my criteria: it didn't fit into one of my standard envelopes and it required 12" x 12" cardstock for the concertina section, which is why my concertina section is a different colour - I had to use something from my odds and ends collection!  I think it works though.
#concertinapopupcard, #thecraftythinker, #stephaniefischer, #stampinupdemonstrator, #funfold, #flightandairy, #concertinapopupcard
The Flight & Airy Concertina Pop Up card when closed

I then made a card using the dimensions at Maria's Crafting Corner that inspired Sam Calcott but used Sam's methodology for the extra pop up dimension.  Whilst smaller, it still didn't fit my criteria.

So I altered the dimensions to suit my needs and created the masculine card at the top of this post using more paper that I got FREE during Sale-A-Bration.  It fits a C6 envelope (although it is a bit bulky) and only requires A4 size cardstock.

#concertinapopupcardfora4, #thecraftythinker, #stephaniefischer, #stampinupdemonstrator, #funfold, #masculinecard, #trustytoolbox, #concertinapopupcard
The A4 friendly version of the Concertina Pop Up Card when closed

If you'd like to create one of these gorgeous Concertina Pop Up cards using A4 cardstock, you'll find my dimensions and instructions HERE. (Edit: But please don't make any alterations to it -  I can't remove anything that other people add).

If you have any questions or comments - I'd love to hear from you.

'Til next time

Stephanie Fischer
The Crafty Thinker

Tuesday 9 January 2024

Double Diamond Pop Up Card with Tutorial links


#stephaniefischer #thecraftythinker  #doublediamondpopupcard  #funfold  #flightandairy  #saleabration  #stampinupdemonstrator
Fun fold: Double Diamond Pop Up Cards


Hello again ... it's been a while!!!  I do apologise.

Whilst I have been rather quiet for the last year, I have still been thinking about you and I've still been creating in my craft room from time to time - I just didn't feel I had much to share.

However, I was really pleased with the way these Double Diamond Pop Up cards turned out.  I used the very pretty Flight & Airy Designer Series Paper (162977) that I received FREE in Sale-A-Bration.

Fun fold: Double Diamond Pop Up Card


Fun fold: Double Diamond Pop Up Card
Flight & Airy paper (162977) and Wanted to Say dies (161594)

The inspiration for the card fold came from Sam Calcott who was in turn inspired by Julie from Trenouths Card Creations.  I used Sam's very easy to follow video but changed the dimensions so that I could use my A4 cardstock.

Sam's card folds down to a 6" square and mine fold down to a 5 3/4" square.  If, like me, you tend to keep A4 cardstock rather than 12"x 12" but would like to make a Double Diamond Pop Up card click HERE for my instructions.

If you have any questions or comments - I'd love to hear from you.

I have a couple more things to share, so I promise I'll be back again soon!

'Til then, happy crafting

Stephanie Fischer
The Crafty Thinker

#stephaniefischer #thecraftythinker  #doublediamondpopupcard  #funfold  #flightandairy  #saleabration  #stampinupdemonstrator
The back of the card: I'll write my message on the white panels


Wednesday 28 December 2022

Cascade Cards featuring FREE paper during Sale-A-Bration

I recieved this very beautiful Christmas card from my friend and team mate, Satomi and it inspired me to make a couple of Cascade Cards using beautiful papers that I received FREE with my $90+ purchase.  Gotta love Sale-A-Bration!  It runs from 5 January to 28 February 2023.

Cascade card made by Satomi
The gorgeous Christmas card I received from Satomi

www.thecraftythinker.com.au, Cascade Card, Sale-A-Bration 2023, Dainty Flowers DSP, Free patterned paper, Stephanie Fischer, Stampin' Up Demonstrator, Australia
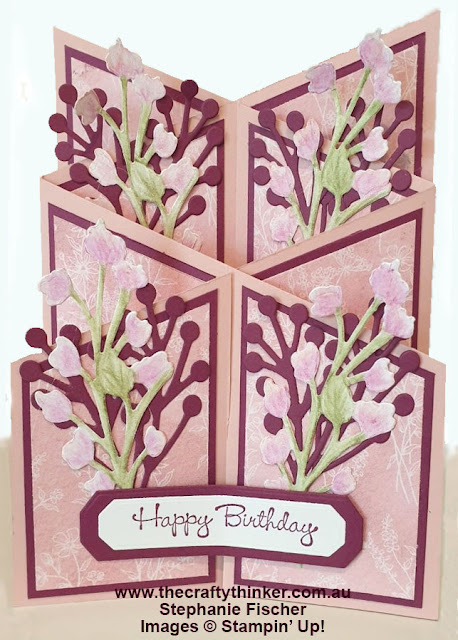
Cascade card featuring Dainty Flowers paper - FREE during Sale-A-Bration
5 January - 28 February 2023

The card above also features flowers cut with the Organic Beauty dies and roughly coloured with watercolour pencils.  I used Blushing Bride and Rich Razzleberry cardstock to coordinate with the paper.  I kept this one simple using only one paper design to decorate the card.
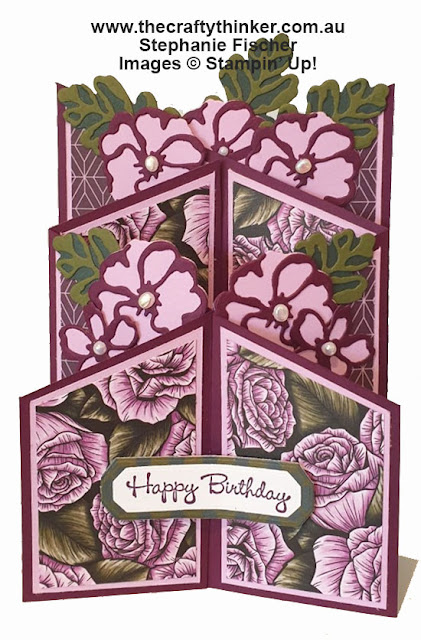
www.thecraftythinker.com.au, Cascade Card, Sale-A-Bration 2023, Favoured Flowers DSP, Free patterned paper, Stephanie Fischer, Stampin' Up Demonstrator, Australia
Cascade card featuring Favoured Flowers paper - FREE during Sale-A-Bration
5 January-28 February 2023

For the card above, I used two designs from the paper pack and cut flowers and foliage with the Harvest dies and Chic dies since I do not yet have the Fragrant Flowers Bundle from the new mini catalogue that coordinates with this paper.

I did, however, use the Flat Adhesive-backed Pearls from the new Mini Catalogue that are absolutely stunning!  I couldn't do them justice with my photo 

I used Evening Evergreen, Blackberry Bliss and Fresh Freesia cardstock to coordinate with the colours in the paper.

I calculated my dimensions for the card to maximise the size whilst still fitting into a C6 envelope.

Please contact me if you would like more details and I'll be happy to email a tutorial.

Click here for more information about Sale-A-Bration and keep an eye out for the new Mini Catalogue that runs from 5 January to 1 May 2023.  If you live in Australia and don't have a Stampin' Up Demonstrator - contact me if you'd like a copy of these catalogues.

'Til next time

Stephanie Fischer
The Crafty Thinker

Sunday 24 July 2022

Kindest Gnomes Suite Christmas cards

Storybook Gnomes, Gnomes Dies, Xmas card, Christmas Card, Stampin Up Demonstrator Stephanie Fischer, Cardmaking
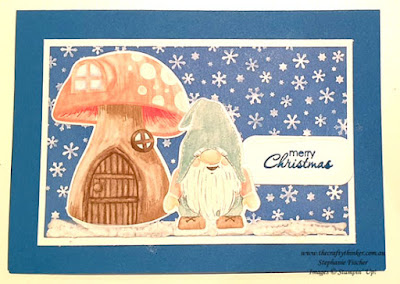
A Diamond Fold card decorated with the Storybook Gnomes paper

To decorate the diamond fold card, I used the coordinating Gnomes dies to cut out the gnome from the Storybook Gnomes Designer Series Paper.  I hand cut the little toadstools from the paper and I added strips of the paper to each side.

To finish the central diamond, I used a now retired embossing folder to add falling snow flakes and enhanced them with a dampened white watercolour pencil.  Having adhered the gnome and toadstools, I added some texture with Snowfall Accents Puff Paint.
Storybook Gnomes, Gnomes Dies, Xmas card, Christmas Card, Stampin Up Demonstrator Stephanie Fischer, Cardmaking
Gnome Dies & coordinating Storybook Gnomes paper

This is an incredibly quick and easy card - perfect for the Christmas rush!

The Gnome Dies coordinate beautifully with both the Kindest Gnomes stamp set and Storybook Gnomes Designer Series Paper.

For this card I used some scraps of cardstock and the dies that build a gnome - cute isn't he?!  I did add some shading and red trousers with a few Stampin' Blends alcohol markers.

The greeting is from the Kindest Gnomes stamp set - but what I love is that I'll be able to use this set year round because the greetings cover many situations ... this is the only overtly Christmas greeting.

I cut the greeting from Pool Party cardstock using a die from the All That die set - I just used this technique to extend it.  I used the same technique to cut out the Sahara Sand label with one of the Painted Labels dies.

Storybook Gnomes, Gnomes Dies, Xmas card, Christmas Card, Stampin Up Demonstrator Stephanie Fischer, Cardmaking
Another Christmas card made with the Storybook Gnomes paper and coordinating Gnomes dies
                       
Another quick and easy card courtesy of the Kindest Gnomes suite!  I die cut the gnome and his toadstool house from the coordinating Storybook Gnomes Designer Series Paper and adhered them to a layer of another sheet from the paper pack.  I finished the card with an application of the Snowfall Accents Puff Paint.

I hope you've enjoyed these cards
Until another time!

Stephanie
The Crafty Thinker
Friday 22 July 2022

Kindest Gnomes Christmas Waterfall card

#thecraftythinker, #kindestgnomes, #waterfallcard, #funfold, #christmascard, #xmascard, #stampinup, #stampinupdemonstratorstephaniefischer
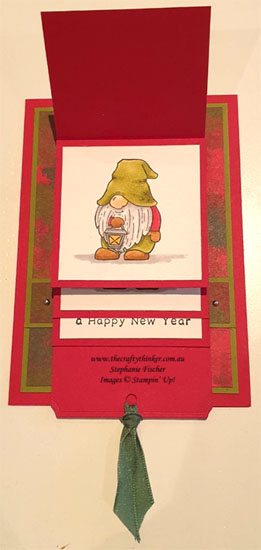
A Christmas Waterfall card featuring Kindest Gnomes

I made this card as a sample for a class teaching Waterfall cards - and because it's that time of year when I start the Christmas card making process.

I changed the dimensions for the waterfall to accommodate these gorgeous gnomes - the ones that I promised myself I wasn't going to buy ....!

#thecraftythinker, #kindestgnomes, #waterfallcard, #funfold, #christmascard, #xmascard, #stampinup, #stampinupdemonstratorstephaniefischer
Each of the "flip" sections features a different gnome

The waterfall mechanism is made from Real Red cardstock and perfectly fits my normal size base card (1/2 sheet of A4 folded in half).  The base card is also Real Red, with mats of Old Olive.  The Designer Series Paper is from the July-December 2022 Mini Catalogue and is called Boughs of Holly.

#thecraftythinker, #kindestgnomes, #waterfallcard, #funfold, #christmascard, #xmascard, #stampinup, #stampinupdemonstratorstephaniefischer
There are four gnome images in the stamp set along with a "dwelling"

I used Real Red and Old Olive Stampin' Blends alcohol markers to coordinate with the paper.  The ribbon picks out the darker green splodges in the paper and is also in the Mini Catalogue in the Real Red & Garden Green 1cm ribbon combo pack.

#thecraftythinker, #kindestgnomes, #waterfallcard, #funfold, #christmascard, #xmascard, #stampinup, #stampinupdemonstratorstephaniefischer
The stamp set is very versatile with greetings covering a variety of occasions, not just Christmas

I made the Whisper White pieces 2 1/2" square to accommodate the gnome without seeing lots of feet in the waterfall!  The Real Red mats are 2 3/4" which means I also made the waterfall mechanism strip 2 3/4" wide.  See image below for the full dimensions.  Although I've changed the dimensions, the method for making the waterfall card remains as per usual.

I wanted to shape the pull tag and decided to use this die from the Painted Labels die set.  I just wanted to shape the very end, so I lined up the die with edge of the card and then placed the top cutting plate just over that edge so that only the end would cut (see below).

#thecraftythinker, #kindestgnomes, #waterfallcard, #funfold, #christmascard, #xmascard, #stampinup, #stampinupdemonstratorstephaniefischer
I used a label die to trim and shape just the end of the waterfall mechanism

#thecraftythinker, #waterfallcard, #funfold, #stampinup, #stampinupdemonstratorstephaniefischer
These are the dimensions I used for my waterfall mechanism

I hope you've enjoyed this card.  I have not included full waterfall card instructions since there are many great video tutorials to be found but will be happy to supply my written tutorial if requested.

Until another time!

Stephanie
The Crafty Thinker


Saturday 12 March 2022

Calming Camellia Twisted Easel Card


www.thecraftythinker.com.au, Calming Camellia, Twisted Easel Fun Fold, Stampin' Up Demonstrator Stephanie Fischer, Sydney NSW
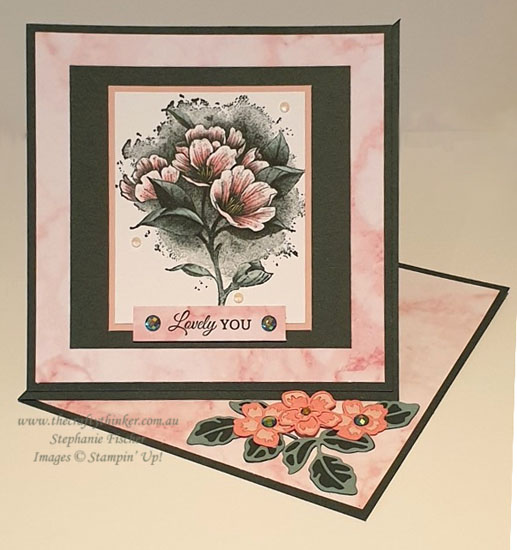
Twisted Easel fun fold card featuring Calming Camellia stamp and Summer Shadows dies

Calming Camellia has now officially been added to my list of all-time favourite stamp sets!  This distinktive stamp is perfect just as is and also looks beautiful with the addition of a little simple colouring.  It's also perfect for multiple occasions or purposes.

For this card, I stamped with Evening Evergreen ink onto Whisper White card and then enhanced it a little with some Stampin' Blend alcohol markers.

The Twisted Easel is such a simple, versatile and effective fun fold!  I cut the base and several layers from Evening Evergreen cardstock, adding layers of Blushing Bride and Simply Marbleous Designer Series Paper (that I got free in Sale-A-Bration).

The base card measures 5 3/4" square (cut the cardstock to 5 3/4" x 11 1/2" and score the long side at 5 3/4".  Score a diagonal from the top right corner to bottom left corner of the card front) and I cut the layer that adheres to the lower section of the base card a little smaller at 5 1/2" square so did not apply adhesive all the way to the edge of the base card.

www.thecraftythinker.com.au, Twisted Easel Diagram Tutorial, Fun Fold tutorial, Stephanie Fischer, Stampin Up Demonstrator, Sydney NSW
Diagram for Twisted Easel base card

The flowers and foliage that decorate the corner of the inside of the card were created with the Summer Shadows dies.  The centre flower is popped up on a Dimensional to form a prop to hold open the easel.

Thank you for visiting.

Until next time!

Stephanie