 |
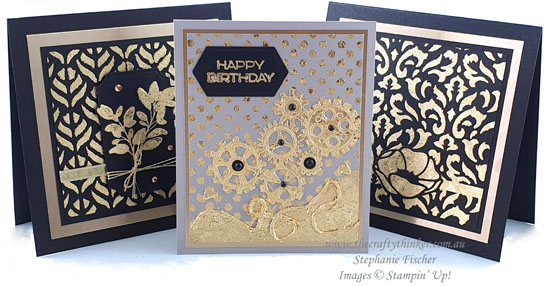
| A trio of cards made with Gilded Leafing Embellishments and a variety of adhesives and application techniques |
There are sooo many ways to use Gilded Leafing Embellishment - all easy and comparatively quick and all fairly messy (although the clean up is easy).
Preparation is key - see here for some tips.
This time I've used Basic Decorative Masks to create gorgeous backgrounds with the Gilded Leafing. To be honest though, they looked so pretty when I'd finished that I was reluctant to do much that would cover them up!
 |
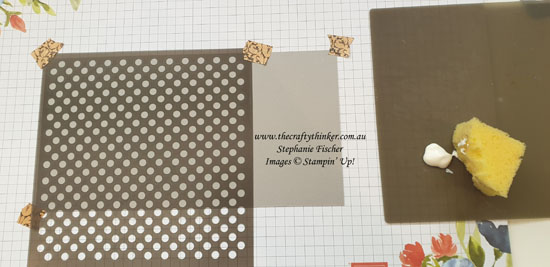
| Preparing to sponge Multipurpose Liquid Glue through the Decorative Mask |
I prefer to use Multipurpose Liquid Glue but any tacky adhesive works well, for example, Heat & Stick powder (use it combined with Versamark in much the same way as heat embossing).
I applied the glue with a piece of sponge (I always cut them into smaller wedges!), using a tapping motion just as I would with ink.
Immediately rinse off the mask (or place it in a shallow container of water until you're ready to wash it) and it will easily come clean. I keep the sponge in a small, sealed container and wash it periodically. Occasionally, I use my fingers to pull off any matted glue. I find the piece of sponge lasts a very long time.
 |
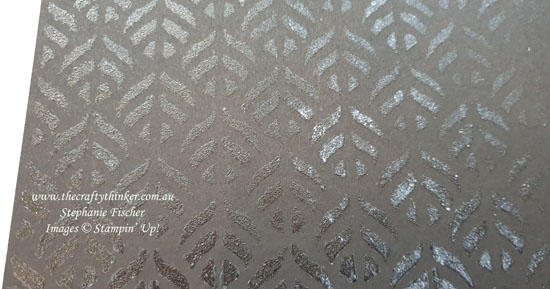
| Wait for the glue to look clear before applying the Gilded Leafing gold flakes The left side is ready but the glue on the right side still looks white and needs more drying time |
Put the project aside for little while until the glue no longer looks fresh and white and has become tacky. Then apply the Gilded Leafing as described here, brushing off the excess and burnishing.
 |
| Gilded Leafing Embellishment flakes are adhered to this card using Multipurpose Liquid Glue, Adhesive Sheet and Tear & Tape double sided tape. |
Tear & Tape is a great way to accent a project with Gilded Leafing - it provides a nice straight line - a bit like a nice shiny gold ribbon!
Product List - All available for purchase in my online storeAnother fabulous adhesive to use with Gilded Leafing is Adhesive Sheet. For the card above, I used it in combination with the Poppy Moments dies to create the stunning gold and black poppy using this method.
Both of these projects have a black base card and a layer of Brushed Metallic Cardstock.
 |
| A gold background made with a mask, glue and Gilded Leafing Embellishment, Painted Labels die and Forever Fern Bundle |
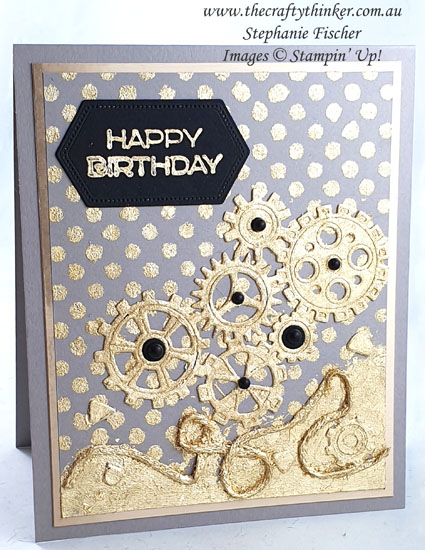
The third card is based on Gray Granite cardstock.
I embellished it with Garage Gears Dies and Gray Granite card coated with Adhesive Sheet. I also scattered some of the little pieces that were removed from the gears.
Then I used Multipurpose Liquid Adhesive and a brush to coat a piece of Braided Linen Trim with glue and stick it to the card front and also brushed the glue over the lower portion of the card front.
 |
| Just apply some tacky adhesive and imagination when using Gilded Leafing Embellishment flakes |
Then I applied the Gilded Leafing, making sure I pushed the flakes well into and around the ribbon
 |
| Gilded Leafing Embellishment has been applied in several ways on this card featuring the Garage Gears dies & Basic Pattern Decorative Masks |
I cut some of the gears from scraps of black cardstock and applied the larger centres as well as some of the Matt Black Dots.
I stamped the greeting (from the Vine Design stamp set) with glue (using this method) and applied Gilded Leafing then cut it out with one of the Stitched Nested Labels Dies.
Thank you for visiting.
'Til next time!
Stephanie


No comments:
Post a Comment