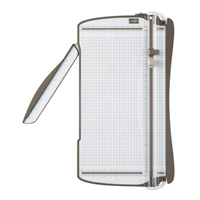
The Stampin' Trimmer makes it sooo easy to create this card! They're made from a piece of cardstock 12" x 4", so I usually cut my 12" cardstock into three and make three at a time.
 |
| Gorgeous images from the Christmas Magic stamp set |
I stamped the images onto Whisper White cardstock with Basic Black Archival ink and coloured them with a variety of Stampin' Write Markers from the Many Marvellous Markers box.
I masked the snowman before stamping the trees.
Although it doesn't show up very well in my photos, I watercoloured the sky and snow areas with Smoky Slate and Sky Blue (using the blue for the snow). There's a touch of Gold Wink of Stella on the wreath decorations.
I cut out the greeting with the banner from the Large Numbers Framelits, glued it to some Basic Black cardstock and snipped around it to create the black border.
 |
| With apologies for my finger (!), this is how the card looks when it is folded up |
Thank you for visiting!
'Til next time
Stephanie
Product List - To shop in my online store, click on a product image below (Australian Residents only)


Really love this card. Outstanding!
ReplyDeleteThank you, Georgee. I really appreciate your comment!
DeleteReally fantastic card!
ReplyDeleteThank you so much for your very kind comment - I really appreciate it.
DeleteI like this one even more! Thoroughly gorgeous with the cute snowman and that train :) love this. Thanks for your directions too they look really easy to follow.
ReplyDeleteThanks Kim. I forgot that I put the tutorial here! So glad I did!
DeleteHi Stephanie. Would you mind emailing your diamond fold tutorial to me? The one on the page with your gorgeous Christmas Magic card is too blurry for me to read to copy or to print. Thank you so much. Darlenea@aol.com
ReplyDeleteWill do!
DeleteWow Stephanie, thank you for sharing this fantastic card and fun fold tutorial, I love it, will defo be cas'ing you, it is too cute, very many thanks ;)
ReplyDeleteI'm so happy you like this card - thank you for your lovely comment, Anne! Have fun with it!
Delete