 |
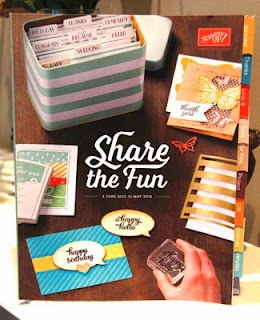
| My 2015-16 Catalogue with easy-locate tabs (thanks to a clever friend!) |
Bohemian DSP - lots of bright, bold colours and patterns (and some more subdued patterns as well).
The embellishment comes in the new
In-colours (I added a rhinestone because ... why not?!). Delightful
Dijon is one of the new colours.
 | |
| Sprinkles of Life cupcake, Bohemian DSP,
In-colour Blossom Accent
|
 |
| The photo doesn't do the glitter justice! |
Stampin' Up! make a donation to Ronald McDonald House with every sale of this stamp set.
There is also a matching punch, which I haven't used yet.....
 |
| Build a Birthday, Boho Chic Embossing Folder |
This one uses the Build a Birthday stamp set - another really versatile set with lots of options. I've added some twisted up Lace Trim and embossed the card with the Boho Chic embossing folder. These are some of the new In-colours: Tip Top Taupe, Watermelon Wonder and Mint Macaron.
 |
| You've Got This stamp set |
This last one uses the You've Got This stamp set, which has the gorgeous flower, the useful grungey background and some supportive sentiments. This time, I chose to use the birthday sentiment from the Build a Birthday set. I used the same In-colours while I had them open. And I do love a bit of bling - so I added a rhinestone to the blossom embellishment again.
Stay tuned for some more sneak peeks over the next few weeks and remember to order your copy of the catalogue - you're going to LOVE it!

Your card is very pretty. Did you stamp the flower over the backgroud or stamp and cut out? If you stamped on the background, how what prevented the background from showing on the flower? Thanks.
ReplyDeleteSorry Ann - see below! I clicked the wrong button!
DeleteOh goodness, Ann - you're really testing my memory!! I think in this instance I stamped the background and then the flower because the pattern and colours didn't really interfere with the flower too much. But, normally, I would stamp the flower, then mask it and stamp the background. For more info on masking techniques, take a look at these posts and by all means email me if my instructions are ambiguous or you get stuck!
ReplyDeleteRemember to use a multipurpose glue on the mask and let it dry (and then handle it or stick it to your clothing a couple of times to remove the extra tack); cut the mask just INSIDE the lines; stamp then mask the image you want to be at the front, then stamp what you want to appear behind it.
http://www.thecraftythinker.com.au/2016/01/by-tide-exercise-in-masking.html
http://www.thecraftythinker.com.au/2019/07/ink-it-stamp-it-international-design.html